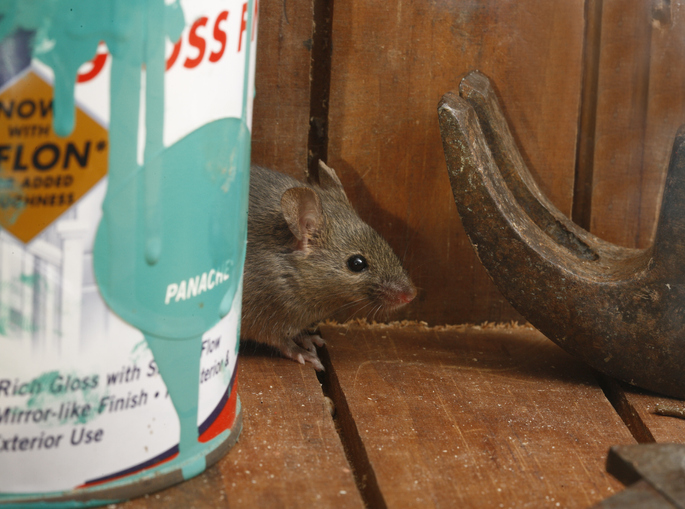
Thoroughly cleaning your home after a mouse infestation is of utmost importance to restore a safe and hygienic living environment. A mouse infestation can pose serious health risks and compromise the cleanliness of your home. Taking prompt action to clean up after a mouse infestation will help prevent the spread of diseases, alleviate potential allergies, and maintain a healthy living space for you and your family.
One of the primary concerns when dealing with mice is their droppings. These tiny pellets can carry harmful bacteria, viruses, and allergens that can contaminate surfaces and the air you breathe. Inhaling or coming into contact with mouse droppings can lead to respiratory issues, allergic reactions, and the transmission of diseases such as Hantavirus.

In addition to the health risks, a mouse infestation can also cause damage to your property, furniture, and belongings. Mice are notorious for gnawing on wires, insulation, and various materials, leading to potential fire hazards and costly repairs.
Understanding the importance of thorough cleaning and sanitization after a mouse infestation, homeowners often have common concerns and questions. Some of these may include how to effectively remove mouse droppings, what cleaning products to use, how to handle contaminated materials, and how to prevent re-infestation.
By addressing these concerns and providing comprehensive guidance on the cleanup process, homeowners can gain confidence and knowledge in tackling the aftermath of a mouse infestation. With the right approach, you can restore cleanliness, mitigate health risks, and prevent further infestations, creating a safe and healthy home environment for you and your family.
Assessing The Extent Of The Infestation
Identifying Signs Of A Mouse Infestation
- Mouse droppings – Mouse droppings are small, dark, and pellet-shaped. They are typically found near food sources, nesting areas, or along the paths that mice frequent.
- Gnaw marks – Mice have a habit of gnawing on various materials, such as wood, plastic, and wiring. Look for chewed holes or marks on furniture, walls, baseboards, or food packaging.
- Tracks and smudges – Mice often leave tracks and smudges along their regular routes. These can appear as greasy marks along walls, baseboards, or on surfaces where mice frequently travel.
- Nests – Mice construct nests using shredded materials like paper, fabric, insulation, or dried plant matter. Look for nests in hidden areas, such as behind appliances, in cabinets, or in wall voids.
- Unusual odors – Mice can generate a distinct, musky odor. If you notice a persistent, strong odor in certain areas of your home, it could be a sign of a mouse infestation.
Conducting A Thorough Inspection
Once you have identified signs of a mouse infestation, it is crucial to conduct a comprehensive inspection to determine the extent of the problem. Follow these steps for a thorough inspection:
- Start with the affected area – Begin your inspection in the area where you initially noticed signs of mice. This could be the kitchen, pantry, basement, or any other area where food is stored.
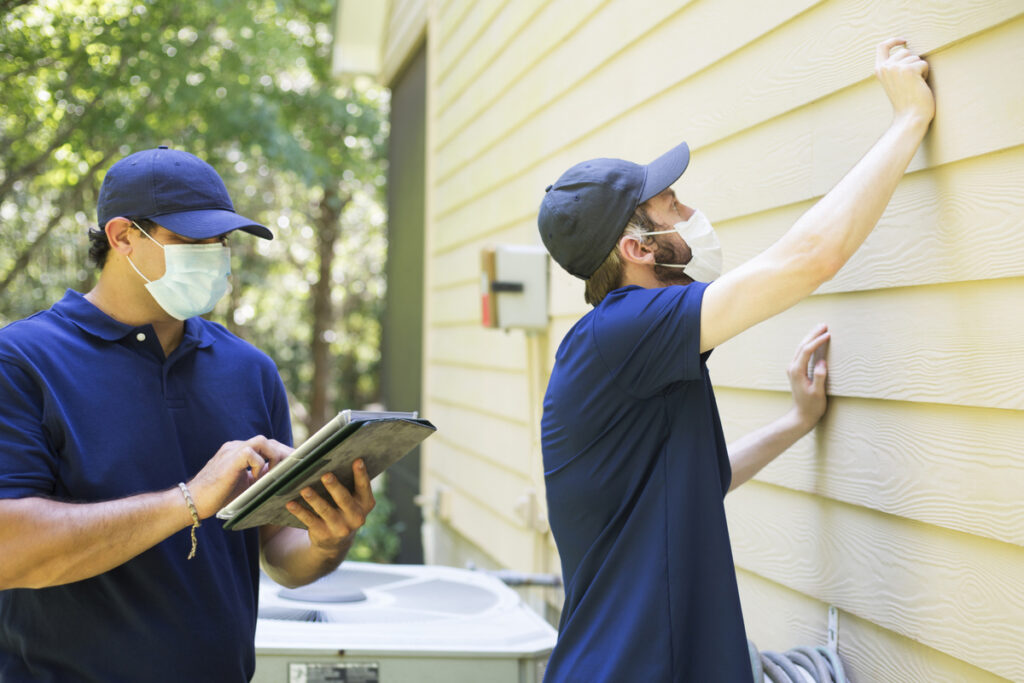
- Check potential entry points – Carefully examine the exterior of your home for potential entry points. Look for gaps or cracks in the foundation, damaged vents, or holes in screens. Mice can squeeze through very small openings, so be thorough in your search.
- Look for trails and pathways – Mice tend to follow specific paths as they travel through your home. Look for greasy marks, droppings, or gnaw marks along walls, baseboards, and utility lines. These trails can help you identify the most active areas.
- Inspect hidden areas – Mice often seek shelter in hidden spots, such as behind appliances, inside cabinets, in wall voids, or in attics. Use a flashlight and carefully inspect these areas for nests, droppings, or signs of damage.
- Check for damage to wiring and insulation – Mice are known to gnaw on electrical wiring, which can create a fire hazard. Inspect wiring, insulation, and other structural components for signs of damage.
- Using protective gear during an assessment
- Gloves – Wear disposable gloves made of latex, nitrile, or vinyl to prevent direct contact with mouse droppings, urine, or other contaminants.
- Mask – Wear a mask, such as an N95 respirator or a surgical mask, to protect yourself from inhaling airborne particles or dust that may be present during the inspection.
- Long-sleeved clothing – Wear long-sleeved shirts and pants to provide an additional layer of protection against contact with mice or their droppings.
By carefully identifying signs of a mouse infestation, conducting a thorough inspection, and using appropriate protective gear, you can assess the extent of the problem and proceed with the necessary steps to clean and eliminate the infestation effectively.
Gathering Necessary Cleaning Supplies And Equipment
To ensure a thorough and effective cleanup after a mouse infestation, it is essential to gather the necessary cleaning supplies and equipment. Here is a detailed overview of the items you will need:
- Gloves – Wear disposable gloves made of latex, nitrile, or vinyl to protect your hands from direct contact with mouse droppings and potential pathogens. Gloves provide a barrier and prevent the transfer of bacteria or viruses to your skin.
- Masks – Use a mask, such as an N95 respirator or a surgical mask, to protect yourself from inhaling airborne particles that may be present during the cleaning process. This is especially important when cleaning up dried mouse droppings, as they can release harmful dust particles into the air.
- Disinfectants – Choose disinfectants specifically formulated to kill bacteria, viruses, and other pathogens. Look for products that are effective against a broad spectrum of microorganisms and safe to use on the surfaces in your home. Common disinfectants include those containing bleach, hydrogen peroxide, or quaternary ammonium compounds.
- Cleaning Solutions – Use appropriate cleaning solutions to remove dirt, stains, and odor associated with mouse infestations. Mild dish soap or all-purpose cleaners are typically sufficient for general cleaning tasks. For heavily soiled areas, consider using enzymatic cleaners designed to break down organic matter.
- Garbage Bags – Have sturdy, sealable garbage bags on hand for proper disposal of mouse droppings, contaminated materials, and cleaning waste. Make sure the bags are of sufficient strength to prevent any leakage during disposal.
- Vacuum Cleaner with HEPA Filter – Invest in a vacuum cleaner equipped with a High-Efficiency Particulate Air (HEPA) filter. HEPA filters are capable of trapping small particles, including allergens and microscopic organisms present in mouse droppings, ensuring they are effectively contained and not released back into the air.
- Cleaning Cloths and Paper Towels – Use disposable cleaning cloths or paper towels to wipe surfaces, remove droppings, and clean up spills. Avoid reusing these items to prevent the spread of bacteria or potential cross-contamination.
- Broom and Dustpan – Have a broom and dustpan readily available for sweeping up larger debris or droppings before cleaning surfaces. This will help facilitate the removal of visible traces of mouse activity.
- Scrub Brushes – Keep a selection of scrub brushes with different bristle strengths to tackle various surfaces. Use a stiff-bristled brush for tough stains or heavily soiled areas, and a soft-bristled brush for more delicate surfaces.
- Plastic Sheets or Tarps – Consider using plastic sheets or tarps to protect larger surfaces or furniture that you cannot easily move. These will help contain debris and prevent contamination of unaffected areas during the cleaning process.
It is crucial to use appropriate cleaning products and equipment to effectively eliminate mouse-borne pathogens and ensure a safe environment. Using the right gloves and masks, as well as selecting disinfectants and cleaning solutions designed to kill bacteria and viruses, will help prevent the spread of disease and ensure a thorough cleanup after a mouse infestation.
Step-By-Step Cleaning Process
Before you begin the cleaning process, it’s important to prepare the affected area to ensure an efficient and effective cleanup.
Preparing The Area
Clear the affected area of any clutter or objects that may hinder the cleaning process. This includes moving furniture, appliances, and any other items that may have come into contact with mice or their droppings. Clearing the area will allow you to access all surfaces and eliminate hiding spots for mice.
Seal off entry points to prevent reinfestation during and after the cleanup. Carefully inspect the area for any gaps, cracks, or holes where mice could enter your home. Seal these entry points using steel wool, caulk, or other appropriate materials to block their access.
Removing Mouse Droppings And Contaminated Materials
Proper removal of mouse droppings and contaminated materials is crucial to eliminate potential health hazards.
Wear protective gear, including gloves and a mask, before handling mouse droppings. This will help protect you from direct contact with bacteria, viruses, and allergens present in the droppings.
Dampen the droppings with a disinfectant or bleach solution to minimize the risk of airborne particles. Spraying a mixture of water and a suitable disinfectant onto the droppings helps to prevent the spread of contaminants during cleanup.
Carefully scoop up the droppings using a paper towel or disposable cloth, and place them in a sealed plastic bag. Avoid sweeping or vacuuming dry droppings as they can release harmful particles into the air.
Dispose of the bag in an outdoor garbage bin or follow local guidelines for proper disposal. Seal the bag securely to prevent any leakage or exposure to others.
Remove and discard any contaminated materials, such as damaged insulation, fabrics, or food items. Items that have been soiled by mice should be disposed of properly to prevent recontamination or further infestation.
Cleaning And Sanitizing
Thoroughly cleaning and sanitizing the affected areas will help eliminate any remaining traces of mouse activity and ensure a hygienic environment.
Thoroughly clean all surfaces, including countertops, floors, walls, and furniture, with a disinfectant or bleach solution. Use a solution recommended for disinfecting against bacteria and viruses. Pay close attention to areas where mice are likely to have traveled or nested.
Use a vacuum cleaner with a HEPA filter to remove any remaining droppings, urine, or nesting materials. A vacuum with a HEPA filter will trap small particles and prevent them from becoming airborne during the cleaning process.
Pay special attention to areas where mice are likely to have nested, such as behind appliances, in cabinets, or in crawl spaces. Clean and disinfect these areas thoroughly to remove any potential traces of mouse activity.
Wash and disinfect any dishes, utensils, or food storage containers that may have been exposed to mice. Use hot soapy water or run them through a dishwasher cycle to ensure proper cleaning and sanitization.
Handling Specific Areas And Items
In addition to the general cleaning steps, certain areas and items require special attention.
Provide a step-by-step guide for cleaning kitchen areas, emphasizing the importance of sanitizing food preparation surfaces and appliances. Use suitable disinfectants and cleaners that are safe for use in food preparation areas.
Explain how to clean and disinfect carpets, rugs, and upholstery that have been affected by mice. Depending on the material, you may need to use steam cleaning, professional services, or specific cleaning products designed for these surfaces.
Describe the process of cleaning and inspecting electrical wiring and appliances for potential damage caused by mice. Ensure that the power is turned off before inspecting electrical components, and check for any signs of gnawing chewed wires, or nests. Consult with a professional electrician if you suspect extensive damage.
Offer tips for cleaning and sanitizing pet areas, such as bedding and toys, to eliminate any traces of mice. Wash pet bedding in hot water with a suitable detergent, and disinfect toys using pet-safe cleaning products. Discard any heavily soiled or damaged items that cannot be effectively cleaned.
By following these step-by-step instructions, you can effectively clean your home after a mouse infestation, minimizing health risks and preventing re-infestation. Remember to always prioritize your safety by wearing protective gear and following proper disposal guidelines for contaminated materials.
Prevention And Post-Cleanup Measures
Preventing reinfestation is crucial after cleaning up a mouse infestation. By implementing preventive measures, you can minimize the chances of mice returning to your home. Additionally, adopting good cleaning and maintenance practices will help reduce the risk of future infestations.
- Sealing off entry points – Inspect your home thoroughly and identify any gaps, cracks, or openings that mice could use to gain entry. Seal these entry points using steel wool, caulk, or other appropriate materials. Pay attention to areas around pipes, vents, doors, and windows. By eliminating entry points, you create a strong barrier against mice.
- Eliminating food sources – Mice are attracted to readily available food sources. Keep food in airtight containers made of glass, metal, or thick plastic. This prevents mice from accessing food and removes their incentive to enter your home. Regularly clean up any food spills or crumbs, particularly in the kitchen and dining areas.
Mice are attracted to even the smallest food remnants. Use sturdy, lidded garbage bins both indoors and outdoors to prevent mice from accessing food waste. Do not leave pet food out overnight. Instead, feed pets at designated times and remove any uneaten food promptly.
- Natural or homemade remedies – Several natural deterrents can help prevent mice from entering your home. Consider these options:
- Peppermint oil – Mice dislike the strong scent of peppermint oil. Soak cotton balls in peppermint oil and place them in areas where mice are likely to enter or travel.
- Mothballs – Place mothballs near potential entry points, but use caution as they can be toxic to children and pets. Keep them out of reach or use alternative repellents.
- Ultrasonic repellents – These devices emit high-frequency sounds that are unpleasant to mice. Place them in areas prone to infestation, but note that their effectiveness may vary.
- Regular cleaning and maintenance – Maintaining cleanliness and tidiness is essential in deterring mice from your home. Follow these guidelines:
- Clean regularly – Regularly clean your home, paying attention to areas prone to crumbs, spills, or food debris. Vacuum and mop floors, wipe down surfaces, and maintain overall cleanliness.
- Declutter – Minimize clutter in your home as mice can find hiding spots in stacks of items. Keep storage areas organized and eliminate unnecessary clutter.
- Outdoor maintenance – Trim overgrown vegetation and shrubs near your home, as these can provide hiding places for mice.
- Properly storing food – Proper food storage plays a significant role in preventing mouse infestations. Take the following precautions:
- Store dry food in sealed containers – Use airtight containers for storing dry goods, such as cereals, grains, and baking supplies. Mice can chew through thin packaging.
- Securely seal trash bags – Tie garbage bags tightly before disposing of them to prevent mice from accessing food waste.
- Pet food storage – Keep pet food in sealed containers, and avoid leaving open bowls of food out for extended periods.
By implementing these preventive measures and adopting good cleaning habits, you can significantly reduce the risk of mice returning to your home. Remember that consistency is key, and ongoing vigilance is necessary to maintain a mouse-free environment.
Health Risks and Safety Precautions
When dealing with a mouse infestation and conducting the cleanup process, it’s important to be aware of the potential health risks involved and take necessary safety precautions. Mice and their droppings can carry various pathogens and allergens that can pose health hazards. Here is an in-depth look at health risks and safety measures.
Health Risks
Mice can transmit diseases through their droppings, urine, saliva, and bites. These diseases include hantavirus, salmonellosis, leptospirosis, and lymphocytic choriomeningitis (LCM). Inhaling airborne particles from dried mouse droppings can lead to respiratory issues.
Mouse droppings, urine, and dander contain allergens that can trigger allergic reactions, particularly in individuals with sensitivities or pre-existing respiratory conditions. Mice also may carry parasites such as fleas, ticks, and mites, which can further spread diseases and cause additional health problems.
Safety Precautions
Wear gloves, masks, and long-sleeved clothing when handling mouse droppings or engaging in the cleanup process. PPE helps protect against direct contact and inhalation of potentially harmful particles. Ensure adequate ventilation during the cleanup process to minimize the concentration of airborne particles. Open windows and use fans to increase airflow.
Thoroughly wash your hands with soap and warm water after handling mice, droppings, or any contaminated materials. Use hand sanitizers if soap and water are not immediately available. Minimize direct contact with mouse droppings or nesting materials. Use disposable gloves and avoid touching your face or mouth while cleaning.
Dispose of mouse droppings, contaminated materials, and cleaning waste in sealed plastic bags. Follow local guidelines for proper disposal to prevent contamination and spread of pathogens.
Clean and sanitize surfaces, floors, and items using appropriate disinfectants. Avoid sweeping or vacuuming dry droppings, as this can release harmful particles into the air. Use a vacuum cleaner with a HEPA filter for efficient containment.
In severe or persistent infestations, consider seeking professional assistance. Pest control professionals have the knowledge, experience, and resources to handle challenging infestations while minimizing health risks.
Conclusion
Cleaning your home thoroughly after a mouse infestation is essential for ensuring a safe and healthy living environment. By following the steps outlined in this guide, including assessing the extent of the infestation, gathering necessary supplies, and taking preventive measures, you can effectively eliminate mice and reduce the risk of re-infestation.
It is important to be aware of the potential health risks associated with mice and their droppings. By understanding these risks and implementing safety precautions, such as using personal protective equipment, practicing proper hygiene, and following recommended cleaning practices, you can minimize the likelihood of exposure to diseases and allergens.
Remember, regular cleaning, proper food storage, and ongoing maintenance are key to preventing future infestations. By maintaining a clean and hygienic home environment, you can create a space that is inhospitable to mice and promote the well-being of you and your family.


