

Q: When should you seal your home to keep fall pests out?
A: Seal in late August to early September. Closing gaps before temperatures drop stops insects and rodents from settling in for the winter.
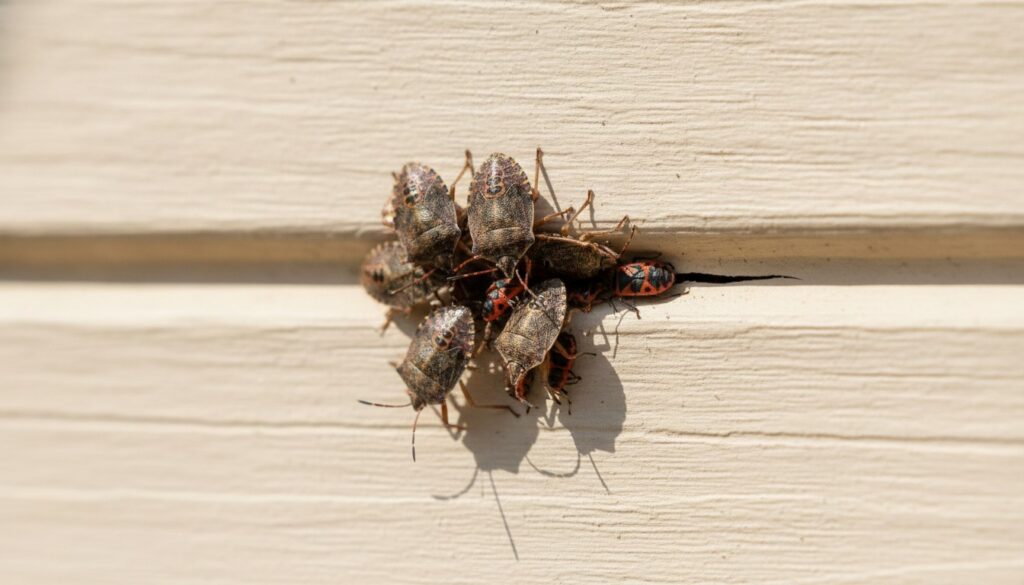

Picture late August: the air still warm, you’re putting away flip-flops and the garden hose, and you notice a few brown, shield-shaped bugs on the siding and a mothlike fly clinging to the attic window. You shrug it off as late-summer nuisance and get back to yard work. A week later there are more of them, and a furry trail appears in the crawlspace.
That is the pattern for overwintering pests. They start scouting for reliable shelter well before the first frost, and the gaps you miss in August become the doorways they use in October. Penn State Extension and UC IPM recommend late August inspections because they are proactive, not premature.
Why fall pests head for your home
When entomologists talk about overwintering, they mean insects and animals are looking for warm, dry refuges to ride out cold months. The behavior is gradual, cued by shorter days and cooler nights. Many species begin exploring shelter sites in late summer, and you will often see adults aggregating on sunny walls or tucked into protected crevices long before the thermometer drops, according to University of Minnesota Extension.
Timing matters. Brown marmorated stink bugs, boxelder bugs, cluster flies and even mice commonly start moving in August and September. Stink bugs, for example, cluster on warm, sunny facades before moving indoors, UC IPM notes. Wait until the first cold snap and attic hatches and wall voids may already be full of insects or rodents that have been nesting there for weeks.
Think in small measurements. Many insects need only a fraction of an inch to enter. Rodents squeeze through openings surprisingly small. A late August inspection and prompt sealing dramatically cut the chances your house becomes their winter residence. Local NOAA forecasts and your county extension office can help you time inspections for your region.
The usual suspects, ID the stink bugs, boxelder bugs, cluster flies and mice quickly
Brown marmorated stink bugs are shield-shaped, roughly 1/2 to 3/4 inch long, and they give off a noticeable odor if crushed, so don’t squash them inside. Boxelder bugs are slimmer, darker and marked with red or orange lines; you’ll often find them clustered on western exposures and tucked into trim crevices. Cluster flies are slow, darker flies that build up in attics and around windows. You may find dead or dying individuals beneath hatchways after they become trapped.
Mice are a different problem and show clear signs: a 3 to 4 inch body length, greasy rub marks along baseboards, tiny dark droppings, runs along walls, gnaw marks on cardboard or food containers, and insulation pulled into nests. Unlike nuisance insects, rodents create contamination and structural risks because they carry pathogens, chew wiring and spoil food, so early exclusion is a public health priority.
If you’re unsure, take a clear photo and compare it to university extension ID guides or call your local extension office. Do you find dozens of dead cluster flies under an attic hatch? Focus on vents, gable openings and the soffit line. A trail of droppings in the pantry points to wall voids or plumbing penetrations.
A room-by-room and exterior inspection checklist
Start by walking the perimeter from about 10 to 20 feet away so you can spot sunlight showing through gaps and seams. Look for trouble spots: attic eaves and gable vents, soffits and roof vents, chimney and flue openings, gaps at siding and trim, windows and doors, foundation cracks, crawlspace vents, and dryer and appliance vent terminations. The larger the opening, the more urgent the repair, but insects exploit much smaller spaces than you might expect.
Bring a bright flashlight, a ladder, a small mirror, a tape measure and your phone to document gaps. Check at dusk or dawn when insect activity is higher. Indoors, use a flashlight to trace runways and look for grease marks or droppings. Simple test: if you can see a sliver of light through a seam when you shine a flashlight from inside, a pest can get through. Prioritize seams larger than about 1/8 to 1/4 inch for insect exclusion and larger openings for rodents.
In the attic, crawl carefully and inspect around pipe penetrations, recessed lights, gable vents and the hatch. In basements and crawlspaces, check where utility lines enter and where vents terminate; rodents favor the voids behind siding and under soffits. Measure the widest point of any gap you find. Noting whether an opening is 1/16, 1/8 or 1/4 inch helps you choose the right sealing material and avoids needless rework.
Seal now, step-by-step exclusion methods
Begin sealing from the attic down so you do not trap pests inside wall cavities, and always leave required vents open. Never plug combustion appliance vents or required attic ventilation.
For gaps under about 1/4 inch, use a good quality exterior acrylic caulk. For trim and areas that expand and contract, pick silicone or siliconized latex caulk for longer life. Larger seams and joints are best handled by pushing a foam backer rod into the joint and caulking over it. Irregular cavities can be filled with exterior-grade expanding foam, applied sparingly and trimmed flush after curing.
Where rodents are a concern, caulk alone is not enough. Tightly pack steel wool or copper mesh into openings, then seal with exterior caulk and add metal flashing when possible. For vents and foundation openings, install 1/4 inch hardware cloth to keep mice out while preserving airflow, and fit or replace door sweeps where you can see daylight under thresholds. When sealing a hole around a basement plumbing line, remove failed material, stuff copper mesh into the void, seal with exterior caulk, and add a metal escutcheon or flashing on the exterior to resist chewing and weathering.
Work methodically: clean and dry the area, remove loose material, measure the gap, apply the right product and test at night with a flashlight for remaining light. Wear gloves and eye protection when handling steel wool or expanding foam, and avoid sealing wires or insulation in ways that trap heat. If you are unsure where ventilation is required or how to maintain appliance clearances, consult the appliance manual or a licensed contractor before sealing. Inspect caulk lines annually and reseal failed joints each spring during routine maintenance.
If pests are already inside
If you find insects clustering in the attic, vacuuming is usually the safest first step. Use a shop vac or a sealed-bag vacuum, empty the bag outdoors, then seal the likely entry points so others cannot replace them. Avoid indiscriminate pesticide foggers inside homes, they can push insects into wall voids, contaminate living spaces and create unnecessary exposure for family and pets. For flying insects, light traps or sticky traps in attics can reduce numbers while you seal entries.
Rodent cleanup requires more care because of disease risk. Ventilate the area for 30 minutes before you start, then disinfect surfaces by spraying with a suitable disinfectant or a bleach solution. Do not sweep or vacuum droppings dry because that can aerosolize particles. After soaking and allowing disinfectant time to work, pick up droppings and nesting material with gloves or paper towels and place them in a sealed plastic bag for disposal.
Wear gloves and a disposable mask, and wash your hands thoroughly after cleanup. For large infestations or suspected hantavirus exposure, contact public health authorities or a professional. Snap traps placed along walls in known runways are effective when used correctly: place traps perpendicular to the wall with the baited end nearest the wall surface and check them daily. Avoid glue traps where possible because they cause prolonged distress. If insulation is heavily soiled with droppings or urine, replace it.
When to call a pro and a season-long prevention checklist
Call a licensed pest management professional when infestations are heavy or persistent, when rodents are nesting in wall voids or causing structural damage, when DIY exclusion does not stop the activity, or when household members are vulnerable, young children, older adults, pregnant people or those with respiratory conditions. A professional will do a thorough inspection, locate hidden entry points such as gaps behind soffits or utility chases, and implement long-term repairs and monitoring that go beyond quick DIY fixes. Integrated Pest Management is the recommended approach: combine exclusion, sanitation and targeted controls rather than relying on repeated pesticide use.
For a seasonal plan, inspect and seal in late August, monitor in early fall, keep an eye on activity through winter, and repair weather damage in spring. Annual tasks include checking door sweeps and screens, verifying attic insulation and venting, and resealing any failed caulk lines. Basic DIY materials for a thorough sealing session, caulk, backer rod, door sweeps, mesh and some flashing, typically cost between $20 and $200 depending on the job. A professional exclusion service or pest control visit usually ranges from roughly $150 to $800 depending on complexity and whether structural repairs are required.
If you have sealed obvious gaps but still find mice in winter, a pro often locates entry points you cannot see, for example a gap behind a soffit where utility cables enter, and installs long-lasting flashing, seals and baited monitoring stations. Use extension office checklists and NPMA resources for seasonal inspections, follow CDC protocols for rodent cleanup, and consult EPA guidance on pesticide safety before applying any chemicals. With a plan, a few basic tools and a calendar reminder in late August, you will greatly reduce the odds that stink bugs, boxelder bugs, cluster flies or mice make your home their winter residence.