As the world evolves, the importance of securing our homes has never been more crucial. DIY home security systems offer a viable and cost-effective alternative to professionally installed options. Embracing a DIY approach empowers homeowners with greater control, customization, and flexibility over their security measures.

Individuals that opt for DIY home security, can save on installation costs and tailor the system to their specific needs. Additionally, the ability to choose and configure the components allows for a seamless integration with existing smart home devices, enhancing the overall home automation experience. This comprehensive guide will delve into the core elements of a DIY home security system, the steps to set up security cameras, the integration of smart home technology, strengthening system defenses against cyber threats, and optimizing remote monitoring capabilities. Whether you’re a tech-savvy enthusiast or a newcomer to home security, this article will equip you with the knowledge and confidence to build a reliable and efficient DIY home security system.
Table of Contents
- Essential Components of a DIY Home Security System
- Setting Up Your DIY Security Cameras
- Integrating Smart Home Technology with Your DIY System
- Strengthening Your DIY Security System
- Monitoring and Remote Access for Your DIY Security System
- Power and Backup Solutions for Your DIY Security System
- DIY Home Security Using Raspberry Pi and Similar Devices
- Best Practices and Common Mistakes
- The Takeaway
Essential Components of a DIY Home Security System
Building a DIY home security system grants you the flexibility to mix and match these essential components based on your unique requirements.
Choosing the Right Security Cameras for Your DIY Setup
When building a DIY home security system, one of the critical components is the security camera. It’s essential to select the right cameras that align with your specific needs and preferences. Here are some popular options to consider:
- Outdoor Surveillance
- Blink Outdoor – A weather-resistant camera with extended battery life and HD video quality.
- Reolink Argus 3 -A wireless camera offering 1080p resolution and advanced night vision.
- Indoor Monitoring
- Wyze Cam Pan – A budget-friendly indoor camera with pan and tilt capabilities.
- Nest Cam Indoor – A high-quality camera with 24/7 live streaming and person alerts.
Exploring Various Sensor Options for Enhanced Security
To fortify your DIY security system, incorporating a variety of sensors is vital. These sensors play a key role in detecting potential threats and intrusions. Here are some sensor options to consider:
- Motion Sensors
- Wyze Sense Starter Kit – An affordable option with motion and contact sensors.
- Samsung SmartThings Motion Sensor – Compatible with various smart home platforms.
- Door and Window Contact Sensors
- SimpliSafe Contact Sensor – A reliable sensor to monitor door and window openings.
- Ring Contact Sensor – Easily integrates with Ring’s DIY security system for added convenience.
- Environmental Sensors
- First Alert Smoke and Carbon Monoxide Detector – Ensures early detection of fire and CO threats.
- Samsung SmartThings Water Leak Sensor – Alerts you to potential water leaks and floods.
Cost-Effective DIY Alarms for Enhanced Alerting
Completing your DIY home security system involves selecting the right alarms to ensure you’re promptly alerted to any potential security breaches. A popular cost-effective alarm is the Kangaroo Siren and Keypad which offers both audible alerts and smartphone notifications and also has a user-friendly setup and integration with popular smart home platforms.
While some components may have a moderate price, the overall cost of a DIY system remains significantly more affordable than opting for professional installation. You can create a tailored and effective DIY security setup to safeguard your home and loved ones, by thoughtfully selecting and integrating these elements.
Setting Up Your DIY Security Cameras
With the right placement and configuration, you’ll gain peace of mind, knowing that your home is under constant surveillance and that you’ll be promptly alerted to any suspicious activity.
Proper Camera Placement for Optimal Coverage
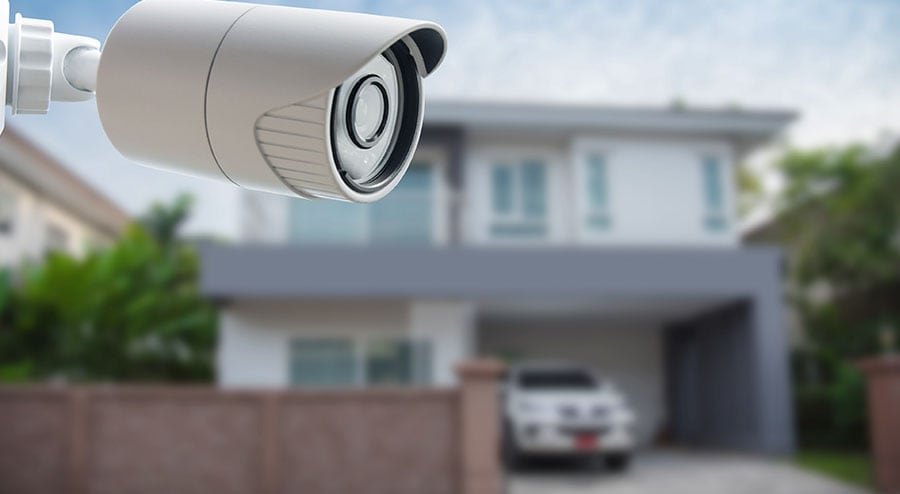
Determining the ideal locations for your DIY security cameras is crucial for comprehensive coverage of your property. Start by identifying vulnerable areas, such as entry points, windows, and backyards. Outdoor cameras should be placed at strategic vantage points to capture any potential intrusions. Brands like Ring and Arlo offer weather-resistant cameras with versatile mounting options, making them suitable for various outdoor environments. Indoor cameras, like the Wyze Cam Pan and Nest Cam Indoor, should be positioned to monitor high-traffic areas and valuable possessions, ensuring you have a clear view of any activity inside your home.
Step-by-Step Guide to Installing and Configuring Your DIY Cameras
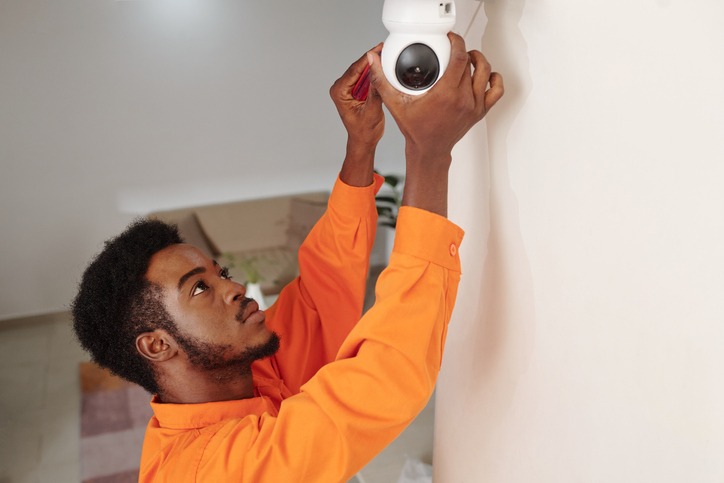
Installing DIY security cameras may seem intimidating, but most modern cameras are designed for user-friendly setup. Begin by installing the camera’s mounting bracket or base securely. Depending on the camera type, you can use screws or adhesive mounts. Next, connect the camera to your home network using either Wi-Fi or Ethernet, following the manufacturer’s instructions. For instance, the Blink Outdoor camera offers a straightforward setup process via the Blink Home Monitor app. Once connected, you can access the live feed and adjust camera settings directly from your smartphone. Many cameras, like the Eufy Security Indoor Cam 2K, offer advanced features such as two-way audio and customizable activity zones to further tailor your setup.
Utilizing Motion Detection and Configuring Alerts
Motion detection is a key feature in DIY security cameras, allowing them to detect movement and trigger alerts. To optimize this function, fine-tune the camera’s sensitivity to avoid false alarms caused by pets or tree branches. Additionally, consider setting up activity zones to focus on critical areas and reduce unnecessary notifications. Brands like Ring and Arlo provide intuitive apps that allow you to customize motion detection settings easily. When configuring alerts, you can choose to receive notifications via your smartphone or email. The Google Nest Cam IQ Outdoor, for example, offers intelligent alerts that differentiate between people and other motion events, ensuring you’re promptly notified of potential security breaches without being overwhelmed by irrelevant notifications.
By carefully placing your cameras, following the step-by-step setup guides, and customizing motion detection settings, you can create a powerful and reliable DIY security camera system.
Integrating Smart Home Technology with Your DIY System
Integrating smart home technology with your DIY security system brings a myriad of advantages, enhancing both convenience and security.
The Benefits of Incorporating Smart Home Devices into Your Security Setup
With smart home devices, you can create a seamless ecosystem that allows different components to work together efficiently. For instance, pairing your security cameras with compatible smart displays, like the Amazon Echo Show or Google Nest Hub, enables you to view live feeds with a simple voice command. Additionally, by integrating smart lighting with your security system, you can program lights to turn on automatically when motion is detected, giving the illusion of occupancy even when you’re away.
How to Integrate Access Control, such as Smart Locks, for Added Security
Access control is a fundamental aspect of home security, and smart locks offer a secure and convenient solution. Brands like August and Schlage offer a range of smart locks with varying features, such as keypad entry, remote locking/unlocking via smartphone apps, and integration with virtual assistants like Alexa and Google Assistant. To integrate smart locks into your DIY security system, follow the manufacturer’s instructions to pair the lock with your chosen hub or smart home platform. Once integrated, you can remotely lock and unlock doors, grant temporary access to visitors, and receive notifications whenever the lock is used, providing you with valuable insights into who enters and exits your home.
Enhancing Home Security with a DIY Video Doorbell
A video doorbell is an excellent addition to any DIY home security system, as it provides a proactive approach to home monitoring. Brands like Ring and Eufy offer video doorbells with high-definition video quality, two-way audio, and motion detection. When someone rings the doorbell or approaches your doorstep, you receive a real-time notification on your smartphone, allowing you to see and speak to visitors from anywhere. Some video doorbells, like the Ring Video Doorbell Pro, offer customizable motion zones, reducing false alarms caused by passing vehicles or pedestrians. Integrating a video doorbell into your DIY security system, gives you a clear view of who’s at your doorstep and enhances the overall security of your home.
Incorporating smart home technology into your DIY security system not only elevates your home’s protection but also makes daily living more convenient. The ability to control various devices through a single platform and receive real-time alerts ensures that you stay connected to your home’s security even when you’re away. You can create a sophisticated and user-friendly smart home security ecosystem that suits your needs perfectly, by selecting compatible devices and following the setup instructions.
Strengthening Your DIY Security System
The strongest security system protects your devices from cyber threats, doesn’t solely rely on the internet and protects against environmental hazards.
Implementing Measures to Protect Your Data and Devices from Cyber Threats
As we rely more on smart technology, safeguarding our DIY security systems from cyber threats becomes paramount. To fortify your system against potential breaches, ensure that all devices, including cameras and smart hubs, are equipped with the latest firmware updates. Regularly change default passwords and use strong, unique ones for each device. Brands like Arlo and Ring prioritize security and frequently release updates to address vulnerabilities. Consider setting up a separate network solely for your DIY security devices to isolate them from other internet-connected devices, reducing the risk of unauthorized access. Employing a virtual private network (VPN) when accessing your security system remotely adds an extra layer of encryption to protect sensitive data.
Creating a Robust DIY System that Doesn’t Rely Solely on the Internet
While internet connectivity is essential for remote access and real-time alerts, a robust DIY security system should not solely rely on it. Some DIY cameras, like the Wyze Cam, offer local storage options through microSD cards, ensuring video recordings are saved even if the internet connection drops. Consider integrating backup power sources, such as uninterruptible power supply (UPS) units, to maintain the functionality of critical devices during power outages. Furthermore, explore options that allow for direct communication between components without relying on the internet, like using Z-Wave or Zigbee protocols for home automation devices. A reliable cellular backup system, like the one offered by Ring, can also step in when the primary internet connection fails, ensuring continuous security monitoring.
Introducing Environmental Sensors for Added Safety and Monitoring
In addition to securing your home against intruders, environmental sensors play a vital role in safeguarding against hazards. Smoke and carbon monoxide detectors are essential additions to your DIY security system to provide early warnings of potential fire or gas leaks. Brands like Nest and First Alert offer interconnected smoke and CO alarms that trigger all connected devices simultaneously in case of an emergency. Water leak sensors, such as the Samsung SmartThings Water Leak Sensor, can detect leaks early, preventing costly water damage to your home. These environmental sensors help ensure comprehensive protection for your home and loved ones.
By taking proactive steps to secure your data and devices, diversifying connectivity options, and incorporating environmental sensors, you can create a robust DIY security system that offers both enhanced protection and peace of mind. Staying vigilant and regularly updating your security measures will keep your home safe from potential threats and provide you with confidence in the reliability of your DIY system.
Monitoring and Remote Access for Your DIY Security System
It is possible to guard your home even when you’re not there, through remote monitoring using mobile apps.
Cost-Effective Ways to Monitor Your DIY Home Security System Remotely
One of the major advantages of a DIY home security system is the ability to monitor it remotely, giving you peace of mind even when you’re away. Several cost-effective methods exist to achieve this:
- Mobile Apps – Most DIY security camera brands, such as Wyze, Eufy, and Blink, offer free mobile apps compatible with iOS and Android devices. These apps allow you to view live video feeds, receive motion alerts, and control other connected devices from the convenience of your smartphone.
- Cloud Storage Plans – Many DIY security camera systems offer free cloud storage for a limited time, typically around seven days. If you need longer storage and additional features like continuous recording, brands like Arlo, Ring, and Nest provide subscription-based plans at reasonable monthly or yearly costs.
- Self-Monitoring – Self-monitoring your DIY security system, can save you monthly monitoring fees. Utilize push notifications and email alerts to keep track of any unusual activity captured by your cameras and sensors.
Setting Up Remote Monitoring and Alerts Through Your Smartphone
Enabling remote monitoring and alerts is a straightforward process for most DIY home security systems. Begin by downloading the manufacturer’s app and creating an account. Pair your devices, such as cameras and sensors, with the app following the provided instructions. Once connected, you can access your security system from anywhere with an internet connection.
To receive alerts through your smartphone, customize the app’s notification settings to match your preferences. For instance, you can choose to receive push notifications for motion detection or doorbell rings only during specific hours. Fine-tuning these settings ensures that you stay informed of relevant events while avoiding unnecessary notifications.
Evaluating the Effectiveness of Your DIY Security System
Regularly evaluating the effectiveness of your DIY security system is essential to ensure it continues to meet your security needs. Perform periodic tests to check the functionality of your cameras, sensors, and alarms. Verify that motion detection is working correctly and that all devices are properly connected to the central hub or smart home platform.
Consider conducting a simulated break-in to test how effectively your system responds to potential threats. This test helps you identify any blind spots or weaknesses in your security setup and allows you to make necessary adjustments. If you notice any issues during these evaluations, contact the manufacturer’s support team or consult online forums for troubleshooting advice.
By utilizing cost-effective remote monitoring options, setting up smartphone alerts, and regularly evaluating your system’s performance, you can optimize the effectiveness of your DIY home security setup. These steps empower you to stay vigilant and maintain a secure environment for your home and family.
Power and Backup Solutions for Your DIY Security System
A reliable power supply is vital to maintain the functionality of your DIY security cameras and devices.
Ensuring Continuous Power Supply for Your Cameras and Devices
When setting up your cameras, consider their power source options. Many DIY security cameras, like the Arlo Pro 4 and Ring Stick Up Cam, offer both wired and wireless options. Wired cameras draw power from an electrical outlet, providing a continuous supply. Wireless cameras are battery-powered and offer flexibility in placement, but it’s essential to monitor battery levels regularly to avoid downtime. Brands like Eufy and Blink offer extended battery life for their wireless cameras, reducing the frequency of battery replacements.
To prevent tampering or power interruptions, ensure that cables and power cords are hidden or protected. Outdoor cameras should be equipped with weatherproof housings and cable clips to shield them from the elements and potential sabotage. Additionally, consider using surge protectors or power strips with surge protection to safeguard your devices from electrical surges.
Incorporating Backup Power Sources in Case of Outages
Power outages can leave your DIY security system vulnerable, making backup power solutions essential. Uninterruptible Power Supply (UPS) units offer a reliable option, as they provide battery backup during blackouts, ensuring continuous operation of your devices. Brands like CyberPower and APC offer UPS systems with varying power capacities to suit different setups.
When choosing a UPS, consider the total power consumption of your security devices, including cameras, smart hubs, and routers. Select a UPS with sufficient wattage to support your devices for an extended period during a power outage. It’s also crucial to place the UPS in a secure location to prevent unauthorized access or damage. Individuals that incorporate backup power solutions into their DIY security system, can see protection even during unforeseen circumstances, giving them peace of mind that their home remains safeguarded.
By addressing power-related considerations, such as ensuring continuous power supply and incorporating backup solutions, you can optimize the reliability and functionality of your DIY security system. These measures ensure that your cameras and devices remain operational, providing you with uninterrupted home security and enhancing the overall safety of your property.
DIY Home Security Using Raspberry Pi and Similar Devices
Raspberry Pi levels up DIY home security and allows homeowners to customize their system according to their preferences.
Exploring Advanced DIY Options with Raspberry Pi and Similar Devices
For tech enthusiasts looking to take their DIY home security system to the next level, single-board computers like the Raspberry Pi offer exciting possibilities. Raspberry Pi is a credit card-sized computer that can be used for various DIY projects, including home security. With its processing power and GPIO (General Purpose Input/Output) pins, you can integrate custom functionalities and sensors to tailor your security system.
Using the Raspberry Pi or similar devices, you can create a centralized monitoring hub that aggregates data from various sensors and cameras. For instance, you can connect multiple cameras, motion sensors, and environmental sensors, then program the Raspberry Pi to trigger alerts or capture video recordings when specific events occur. With its open-source nature, the Raspberry Pi community offers numerous tutorials, software, and projects designed specifically for home security applications. This allows you to customize your system according to your preferences and expand its capabilities over time.
Steps to Create a DIY Home Security System Using Single-Board Computers
Building a DIY home security system with a single-board computer requires some technical expertise, but the rewards are well worth the effort. Here are the general steps to get you started:
1. Gather Components – Acquire a Raspberry Pi or similar single-board computer, a compatible camera module (such as the Raspberry Pi Camera Module), and various sensors (motion sensors, door/window contact sensors, etc.). Additionally, ensure you have a power supply, microSD card, and necessary cables.
2. Set Up the Single-Board Computer – Install the operating system (e.g., Raspberry Pi OS) onto the microSD card and boot up the device. Configure the necessary settings, such as network connectivity and user accounts.
3. Install Security Software – Utilize open-source software, such as MotionEye or ZoneMinder, to turn your single-board computer into a surveillance hub. These software options provide user-friendly interfaces for managing cameras, sensors, and alerts.
4. Connect Cameras and Sensors – Attach the camera module and sensors to the GPIO pins on the single-board computer. Follow the provided instructions to ensure proper connections and functionality.
5. Configure Rules and Alerts – Program the security software to react to specific events, such as motion detection or sensor triggers. Set up rules to record video, send alerts to your smartphone, or activate alarms when suspicious activity occurs.
6. Test and Fine-Tune – Conduct thorough testing to ensure all components are working as expected. Adjust the sensitivity of sensors and cameras to avoid false alarms while maintaining efficient monitoring.
Remember that DIY home security systems using single-board computers require continuous maintenance and updates to ensure optimal performance and security. While the initial investment may be lower compared to commercial solutions, it does require a higher level of technical proficiency. Nonetheless, this advanced DIY option provides an opportunity to build a unique and sophisticated home security system tailored to your needs and preferences.
Best Practices and Common Mistakes
Follow these best practices to avoid common mistakes and create a robust and secure DIY home security system that provides reliable protection for your home and loved ones.
Tips to Secure Your Home Network and DIY Security Devices
Securing your home network and DIY security devices is crucial to prevent unauthorized access and protect your privacy. Here are some best practices to follow:
- Strong Passwords – Always use strong, unique passwords for your home network, cameras, and smart home devices. Avoid using default passwords, as they are easily exploitable by hackers. Consider using a password manager to keep track of complex passwords.
- Regular Firmware Updates – Keep your DIY security devices up to date with the latest firmware releases from manufacturers. These updates often include critical security patches that address vulnerabilities.
- Network Encryption – Ensure your home Wi-Fi network is encrypted with WPA2 or WPA3 security protocols. This prevents unauthorized users from eavesdropping on your network traffic.
- Two-Factor Authentication (2FA) – Enable 2FA whenever possible, adding an extra layer of security to your accounts. With 2FA, you’ll need to enter a code from your smartphone or another device in addition to your password to access your accounts.
- Guest Network: Create a separate guest network for visitors to connect to, keeping your primary network secure from potential threats.
Common Mistakes to Avoid During Installation and Configuration
While setting up a DIY home security system can be empowering, there are some common mistakes that can undermine its effectiveness:
- Poor Camera Placement – Avoid placing cameras too high or too low, as this can result in suboptimal coverage. Ensure that cameras are strategically positioned to capture crucial areas, such as entry points and driveways.
- Overlooking Password Changes – Failing to change default passwords on DIY security devices is a major security oversight. Always change the default credentials to unique, strong passwords to protect against unauthorized access.
- Neglecting Software Updates – Skipping firmware updates on cameras and other security devices leaves them vulnerable to exploits. Regularly check for updates and apply them promptly to keep your devices secure.
- No Backup Power Source – Forgetting to incorporate backup power solutions, such as UPS units, can leave your DIY security system vulnerable during power outages.
- Inadequate Testing – Neglecting to test the functionality of your security devices, sensors, and alarms can lead to unreliable performance when you need it the most. Regularly conduct tests to ensure all components are working correctly.
Being proactive in maintaining and updating your system will ensure that it remains effective in safeguarding your property against potential threats.
The Takeaway
In today’s ever-changing world, securing our homes has become a top priority. DIY home security systems provide homeowners with the tools and knowledge to take charge of their safety effectively. Individuals can tailor their security systems to their specific needs, integrate smart home devices seamlessly, and save on installation costs, by embracing a DIY approach. The ability to monitor and control their DIY systems remotely offers unparalleled peace of mind, knowing that they can keep an eye on their homes from anywhere.Embracing a DIY mindset allows us to stay ahead of potential threats, reinforcing the belief that protecting our homes is an ongoing journey that empowers us to create a safer environment for the people and possessions we cherish most.


